
FREE SHIPPING
ON ORDERS OVER $500

FREE LIFETIME SUPPORT
FROM THE EXPERTS

MONEY BACK GUARANTEE
NOT HAPPY? SEND IT BACK
CLEVER LOGGER
Ideal for fridges
LOGTAG
Ideal for shipping
ON ORDERS OVER $500
FROM THE EXPERTS
NOT HAPPY? SEND IT BACK
This is the transcript for one of our new training videos.
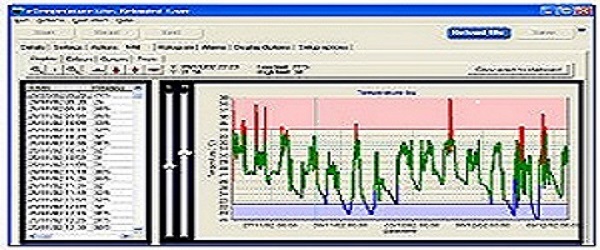
This short video will take you through how to program a temperature logger using the eTemperature software.
When eTemperature is running you will see the message “Waiting” at the top.
When you plug a Thermochron into the reader you will see this message change from “Waiting” to “Read time success”.
The screen will also change to show the “Details” tab.
The details tab has two sections of information. The left hand side shows information about the type of device that has been connected. The right hand side contains information about the current status of the device. In this case the device has stopped and we need to restart it.
Press the “Reprogram” button and the “Settings” tab will appear.
There are 5 pieces of information you will need to enter – 1. The description, 2. The sample rate, 3. What to do when the memory is full, 4. When to start and 5. The alarm limits.
Firstly, the description. This will be saved in the logger and will appear when it is plugged in again. It will form a part of the saved file name, and will be available to users in the future to know what the results are for. Typically it would contain the name of your company, the specific fridge or vehicle being monitored, the experiment reference, or the colour of the fob.
The next thing to setup is the sample rate. This is how often the temperature logger will wake up and store a temperature reading. There is a compromise between being too fast and using up the memory too quickly, or being too slow and missing critical information.
As you change the sample rate, you will see the information about when it will run out of memory change. If you download the results before this date you will not lose any results.
This unit is the TCS which has the option for 8 or 11 bit samples. 11 bit samples are better and should be used. This gives 4,000 readings in memory. The TC model has 2000 readings.
For people who don’t know what sample rate to use, here are some recommendations:
The allow rollover flag is the next critical flag.
The guideline for this is very simple – turn it on. This means the logger will always be running and storing results. The oldest results will be lost when the memory is filled and you will always have the most recent readings.
By turning the allow rollover flag on, you won’t need to reprogram the logger each time you retrieve the results. Just retrieve the results and put the logger back in place.
The only exception is if you are shipping something and can’t control how quickly the logger will be returned to you. In this case turn it off but you will need to reprogram the logger each time.
The start delay is reasonably self-explanatory, but most people will use the “No delay” feature so that the logger starts immediately.
The temperature alarm limits are the final set of options. They have a very minor role and if you don’t set them correctly it doesn’t matter. You will see their impact in the video on retrieving the results.
Once the settings have been entered then press the “Start” button. If the start button is not available then press the “Stop Logging” button first and then the “Start” button.
If you have enabled rollover then you will probably only need to program the loggers once.
I hope you have found this training video informative. Please visit the etemperature.com.au website for further information or contact us at [email protected] with any comments or questions.

Not sure which Thermochron is right for you? Need a hand setting things up? Got some strange data you want explained?